15.2.13

Day of the dead one year ago

So, I just realized that I've left my blog sailing away solo in internet waters. What a bad sailer.
Since November 2012 I took some photos of something I wanted to share with everyone, it is a little part of the traditions of my country. I really LOVE my traditions, I LOVE being mexican and all that it involves.
I know it's been already a year since this holiday and pictures were taken, but I guess it's never too late when it comes to sharing. But here is Dia de los Muertos again, so let's get the photos rolling. 


Being so full with work for future projects is really my kind of life right now. Studying another language for a master in Lyon next year, working for my plane ticket. Working for a college scholarship and visiting kids in hospitals just to make them laugh. If this isn't a good explanation of busy, then I don't know what could be.
Between all this activities I've also being taking photos like crazy and today I want to share one of my best experiences from last year.

In 2012 I got the opportunity to go "visit" my grandparents on November 1st. Here in Mexico this day is a very special one, according to traditions, it is the date when our loved and dead ones come to visit. We put an altar at home with the things our loved ones liked, from fruit, mole, all their favorite food and drink, cempasuchil flowers (marigold),papel picado, candles, salt, water, with every item having its particular meaning. 

For me it's a very fun tradition, full of color, good food and family. A lot of people is curious about how someone could like a tradition like this, involving dead. I really don't know, I guess it feels good believing that the ones that already parted, can come and be with us for a little while. 

A lot of kids enjoy this celebration, I think it's a cultural thing, it comes from every family, and in every corner of Mexico, there's a little difference, but the essence is the same. Nowadays some kids are forgetting about this tradition because I guess it's more fun to dress up and eat candy. I would love if they could follow both ways, Halloween and Day of the Dead, since I don't have nothing against the North American celebration. Who doesn't like candy, really?

Also last year I got another great opportunity. Participating in Coyoacan's fair of Day of the Dead bread. I went in with some sugar skull looking cookies, making something so traditional a little bit updated for those new generations to still keep their interest. I've got to say I feel very proud of the cookies since they were a hit. I spend a lot of time on making and decorating them in the tiny apartment kitchen, but successfully. 

It was a nice year and a nice celebration, just as this year's. 
I don't know how I will cope with being away from my country and food for so long. Have you ever been away for a lot of time? What is it you missed the most? How did you cope with it? Let me know in the comments!

Sugary kisses and bony hugs!!
Val
XOX


2.10.12

Bunnies and Sugar

Here is one of my fave recipes. Sugar Cookies. So easy, few ingredients, a total no-brainer.
I've received several compliments about them, because they taste just good! And also because you can decorate them as you wish with a simple Royal Icing recipe.
This bunnies may be great for Eastern. Even though here in Mexico we don't celebrate it, I'm used to see a lot of bunnies and colored eggs in April (:
I remember making this and wrapping them in baskets whenever I needed a gift for someone, even one of my cousins who went to Canada for a year asked if I could bake her a basket before she went away.

Sugar Cookies
Yields ~ 40 cookies

Ingredients:

  • 1 cup butter
  • 1 cup powdered sugar
  • 1 egg beaten
  • 1 1/2 tsp almond extract (optional)
  • 1 tsp vanilla
  • 1 tsp salt
  • 2 1/2 cups sifted flour
Directions

  • Cream butter. Add powdered sugar. Blend in egg, almond extract, vanilla, salt and flour.
  • Chill dough until firm. Roll to 1/4" thickness on a floured surface. Cut the shapes you want with cookie cutters.
  • Place on greased cookie sheets. Bake at 375 F (190°C) for 8-10 minutes.
  • Let cool and decorate.
I'll also share with you my fave Royal Icing recipe, so you can decorate this delicious cookies with this equally yummy icing.

Royal Icing

Ingredients:

  • 4 cups powdered sugar, sifted
  • 2 tbsp. meringue powder (substitute w/ 3 egg whites)
  • 5 tbsp warm water
Directions

  • Beat the egg whites and add sugar slowly, finally add water depending in its texture and how you want it for your cookies.
  • If it's too thick add more water, until you have the right consistency for piping.
Note: I normally cut this recipe in half as it makes lots of icing, though its not easy to measure 1.5 egg whites, I do my best and it always ends up great.

As you can see this recipes are real easy, and you can whip a batch of decorated cookies in no time. Fabulous, don't you think?
Share with me how you did. Any suggestion or question, leave it on the comments, down there. :D

OXO
Val

14.8.12

How 'bout some sushi?

Lately I've been in a killer sushi mood. Since I found this place at Col. Roma, I can't stop thinking about breaded california rolls, how amazing does that sound? It tastes better, I can assure!

So with all this, Mr. Universe said- let's get this gal sushi-sick- But, hey Universe, that didn't happen. I tell you this because I recently had to cook some sushi @ school, it tasted real nice, and they allowed me to be creative with a few ingredients, salmon, surimi, avocado and cream cheese... infinite combinations, right?
So, back to a serious topic...

I'm going to share with you our sushi recipe. That recipe said 6 portions... yeah right, if you're like me, 2 makis are just for you, so where the heck do we get 5 more portions? I don't know. But even with those details, it came real good. So let's get rice cookin' and some sushi rollin' (:

Salmon / Crab sushi

Ingredients:

  • 185 g sushi rice
  • 125 ml vinegar (really? I used waaay less)
  • 10 g sugar
  • 5 g ajinomoto (optional) it is MSG
  • 100 g crab surimi*
  • 250 g avocado (1 piece is enough)*
  • 5 sheets seaweed (nori)
  • 100 ml soy sauce
  • lime juice (1 piece)
    • 100 g smoked salmon*
    • 190 g cream cheese*
Note: The last two ingredients are for salmon sushi, but you can make the combinations your cravings shout for. * these ingredients must be cut into sticks (:

Method:

1. Soak rice in cold water, until water comes clear. Cook in a pressure cooker for 8 minutes, with water covering rice 1 cm top of it.
2. Mix vinegar, sugar and MSG.
3. Spread cooked rice onto a tray and sprinkle with vinegar mix. Let cool.
4. Put a seaweed sheet over your sushi mat with bright side facing it. Put some rice on top and cover all the surface (except for borders) pressing for making a flat surface. Fix your favorite ingredients on top, in the side that's closer to you.
5. Start rolling the sushi pressing so it sticks together. When you first start rolling, you should wrap the sticks of whatever so that it stays in the center. Press well and keep rolling in the deep...
6. Cut your maki in half and the resulting parts in half, then in half again... until you have the number of sushi slices (nigiris) you like (:
7. Mix soy sauce with lime juice. Dip your sushi and enjoy!

Lots o' love
V

17.7.12

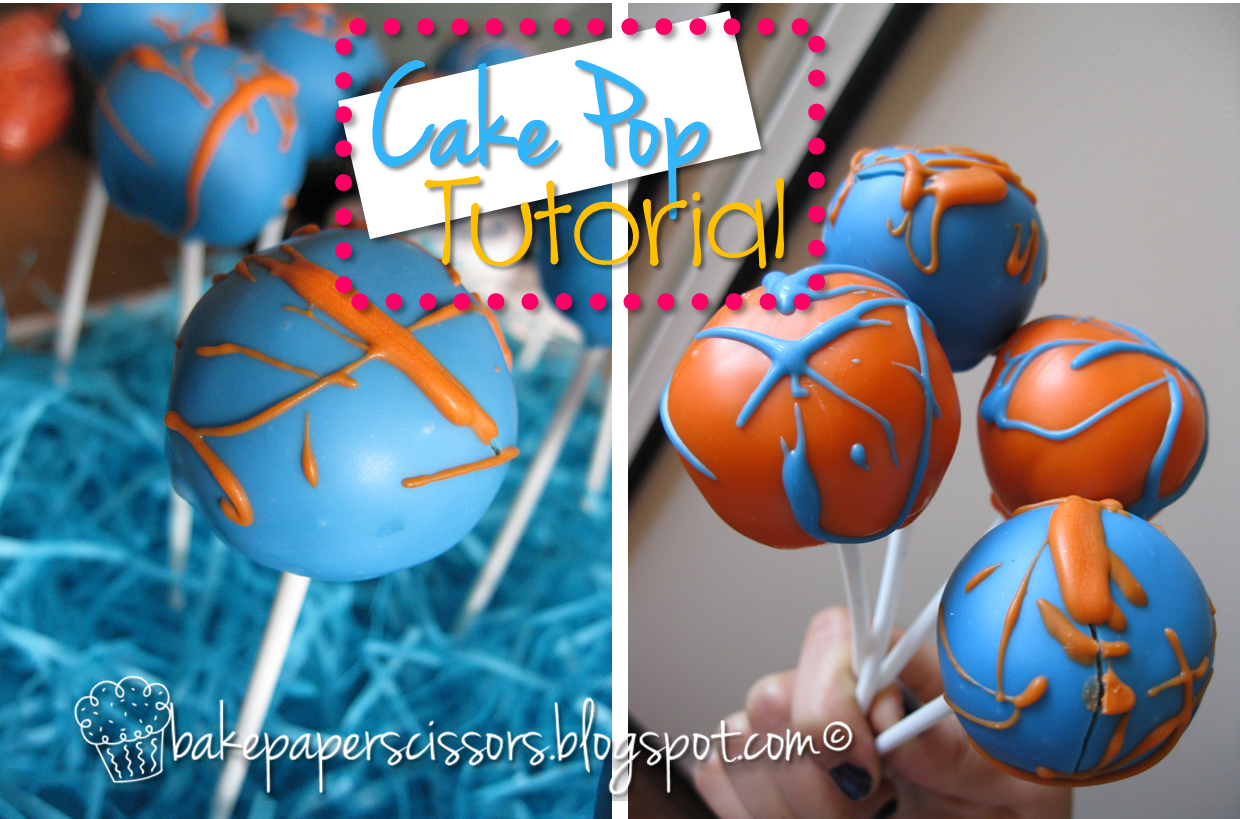
Cake Pops Step-By-Step

Today I want to share with you a cake pop step-by-step. A lot of people have asked how to do cake pops and I thought I could contribute with a tutorial based on my experience.
So between bracelets and everyday cooking I made some cake pops a while ago. Here is the complete method. True & tried!
Get all your ingredients and let's start!

Ingredients:

A box of cake mix (prepare it as you normally would) or your favorite cake recipe.
A can of frosting (your preferred flavor).
Color candy coating.

The how-to:

1. Once you have your cake cooled, crumble it. With your hands preferably.
2. Add half a can of frosting to all your crumbled cake.
3. Mix well. If you use your hands, the end result will be better (well, maybe not, but it makes it fun).
4. You know it's ready when you can make a ball that holds its shape.
5. Take it to the freezer for like an hour and then make small balls. Take those to the freezer too.
6. Dip the sticks in some melted candy coating and insert them in the cake balls.
7. Plunge your cake balls in melted candy coating. Don't let them touch the bottom of your container. If you need to cover them with a spoon.
8. Tap your hand (the one with the cake pop) to remove excess of coating.
9. Put them in some styrofoam and let them sit. You can return the to the freezer if you're not going to use the right away.
10. Decorate as you wish.
Finally, ENJOY!!

I hope you've found this step by step helpful!

Cake hugs & frosting kisses, 

26.6.12

Friendship bracelets

I don't know if these bracelets are making a comeback in fashion, but lately I've been eager to try new patterns and color combinations.
Recently I made this bracelet for a friend of mine, since it was her birthday and she loves bracelets as much as I do. But something happened, somewhere between my apartment in mexico city and my house in hidalgo, I lost the bracelet. Luckily I took a picture when it was finished and it looked awesome. Well, I loved the colors and all.
tell me, what do you think?
I'll upload the pattern for this bracelet later on!

Lots o' Love